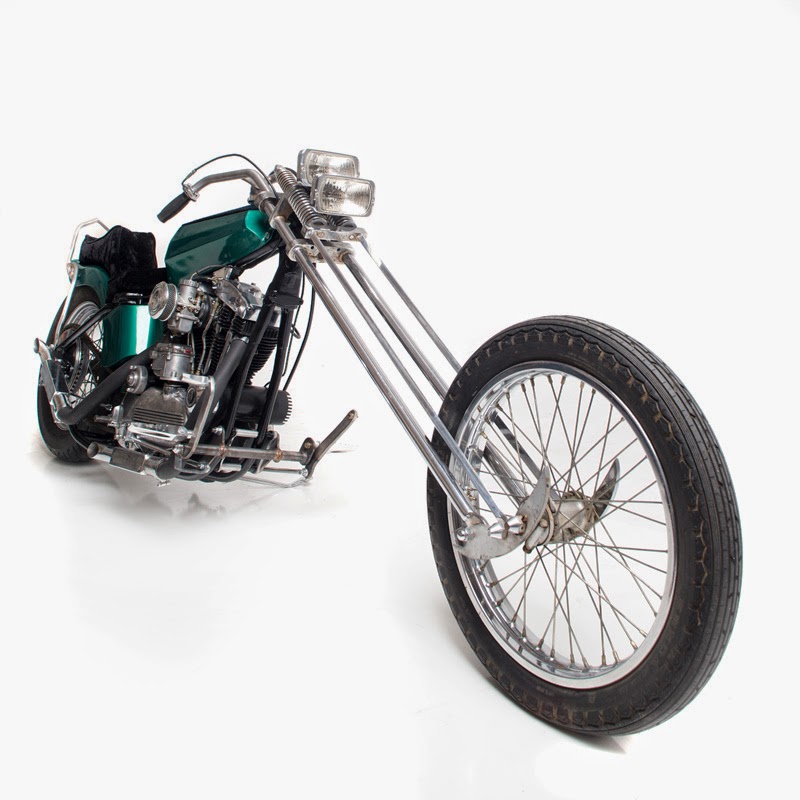
Wednesday, May 15, 2013

Mid-May update

Made this seat: 


the Ironhead is looking like this so far:

 
All the various stamps Danny has CNC machined.  Need a logo leather stamp?  Hit out Big Cartel store  http://www.buschandbusch.bigcartel.com

Tuesday, May 7, 2013

Random happenings part 2

 
Bought a Singer 206k for sewing together upholstery and small projects.  Does three layers of thin leather, straight and zigzag, and for a good price.  Couldn't be happier.  Except for the expensive obsolete needles......

Also got a Singer 29k58, manufactured in 1934.  What a beauty!  Obviously you can see the size difference, and it will do half an inch of leather!
 
Did some CNC machining for a wallet stamp.


Bought a Singer 401a Slant-O-Matic.  Amazing!  Hundreds of stitch patterns, lots of accessories, twin needle setup,  just super cool.  Made in 1957, cabinet included, works great.  Will handle 3 layer of leather, but will not do decorative stitches in it.  Is happy with two layers,  will do fancy stitches in upholstery leather which is fine by me-  monogramming, decorative edges, etc., will all kick up our game.

 
Learned the basics of sewing.

got some really fancy scissors.  Learned to use the circular stitcher.

Remi got her cone off!

Welded up the tail section on the Dragster finally.  Wait-  forgot to upload progress pics of the tail.  Oh well, here it is done.

Back view, working out the tail light.

Sewed together a file roll, our first real project on the sewing machine!

Made a dual reservoir master cylinder mount for the '65 Econoline project.

Just a bunch of random happenings in April and May

Ichi got a shirt

I got a Sportster Bicycle-  Roadmaster, from the 90's.  Been looking for one of these babies for a while.


Remi got in a fight.

Made some Bic covers for TRIco

Made some Burrito Bags for TRIco

 
Made a killer Dice van Burrito Bag, shag carpet included


Made a Richard Pryor "Car wash" wallet

The Can am Spyder key covers are still proving popular, made a slight design change so they fit better

Made a bunch of Backfire Moto flasks

Did a single backbone conversion and dropseat on a 1981 Honda CB750c

Made this cool sheath for a friend's grandpa's knife

Had some killer sunsets


Friday, April 12, 2013

Making a tank, pt 4

Now with the two halves trimmed and shaped correctly, we smoothed out the crown where the two meet up, to make a nice weld joint.
 
We made a filler strip to go underneath the seam-  this serves two purposes:  first, it absorbs heat, which is very important when welding aluminum sheet.  Second, it distributes the stress when you weld it to each half from the underside, so that your seam down the center doesn't have to absorb all the stress and vibration.

strip tacked to one half, then the tacks were ground down so that the second half could mate up flush with the this one-  you don't want a gap down the center to fill in.

Welding the top seam

Done-  in retrospect, we should have taken the few hours to metal finish all the shrinker marks on each half, because now it will take TWICE as long to finish them without disturbing the weld.  It may just need to be ground down flush, we are not sure yet.....


A little more shrinking to add some curve to the lower tank edge, along the main "bulge" on each side.

BAM!  We also took a few minutes to add the nice detail of a tank badge recess, by using a metal hammer form and just pounding it in with a plastic mallet, no wizardry involved!

On the bike-  you can see the shrinker marks more clearly here, not a big deal, just will take a lot of filing and wet sanding, because we intend to go for a mirror finish on these pieces.

Starting the tunnel.......

Monday, April 8, 2013

Making a tank, pt 3, shell finished.

Trimmed to fit around the heads, now to make the tunnel and floor.....


Making a Tank, pt 2

 
back to the wheel to concave the tank around the bulge, sort of the signature Bultaco Sherpa shape

 
Danny making a buck to hammer the top edge of each side around, he then used a router to round the edges

side clamped to the buck, beating wildly.  It worked, somewhat...


but needs more annealing


now more hammering at the top edge on the beater bag


Now to use the shrinker on the top edge to bring the fronts of each half in towards the backbone
 
now we have the right shape up top- and you can see how the shrinker brought the fronts in, and overlapped them. 


Now to trim each half down the top centerline
 
yup, we're getting somewhere now


yess

yessss

yesssssss  a mirror image of the old tank!
 
more soon